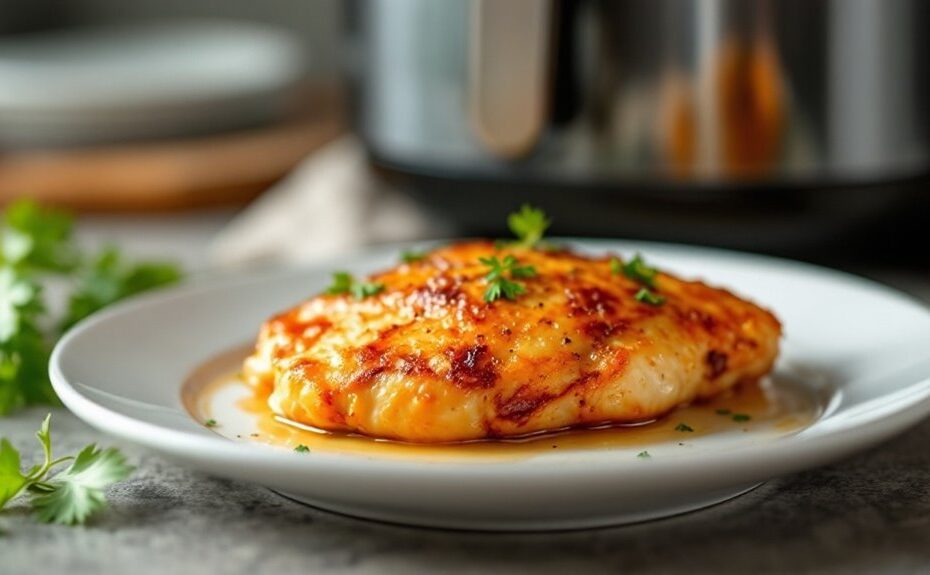
Imagine pulling perfectly juicy chicken thighs from your air fryer, their skin crisp and golden while the meat stays tender and flavorful. To achieve this, you'll need to start with the right cuts and seasonings, but the real secret lies in how you handle the cooking process. Preheating the air fryer and avoiding overcrowding are essential steps, yet there's more to it than meets the eye. What if the key to locking in moisture isn't just about timing but also about what you do after the cooking stops? The answer might surprise you.
Key Takeaways
- Choose boneless, skin-on thighs or evenly sliced chicken breasts for moisture retention and even cooking.
- Season with versatile blends like garlic powder, paprika, or Italian herbs for deep flavor penetration.
- Preheat the air fryer to 400°F (200°C) for 3-5 minutes to lock in moisture and ensure a crispy crust.
- Cook chicken in a single layer with space between pieces, checking halfway and using a meat thermometer for 165°F.
- Rest chicken for 5-10 minutes after cooking to redistribute juices, ensuring moist and flavorful results.
Choose the Right Chicken Cuts
When selecting chicken for your air fryer, opt for cuts that balance juiciness and crispiness. Boneless, skin-on thighs are a great choice—they stay moist while the skin crisps up beautifully. If you prefer white meat, go for chicken breasts, but make sure they're evenly sliced to about 1-inch thickness. This cut thickness helps the chicken cook evenly and prevents dryness. Drumsticks and wings also work well, as their natural fat content keeps them tender. Avoid overly thick cuts, as they might not cook through properly, or thin ones, which can dry out. Remember, the right cut sets the stage for successful chicken marination, allowing flavors to penetrate deeply. Choose wisely, and you'll set yourself up for juicy, flavorful results every time.
Season Your Chicken Properly
Start by selecting seasonings that complement your chicken—think smoky paprika, garlic powder, or a zesty lemon pepper blend. Pat the chicken dry with a paper towel, then sprinkle the spices evenly over every inch, making sure to coat both sides for a golden, flavorful crust. Don't be shy—generous seasoning guarantees each bite bursts with taste.
Choose the Right Seasonings
To guarantee your chicken bursts with flavor, selecting the right seasonings is key. Start with versatile seasoning blends like garlic powder, paprika, and onion powder for a savory base. For a smoky kick, add cumin or smoked paprika, or go bold with cayenne for heat. Experiment with flavor combinations—try lemon zest and thyme for brightness, or rosemary and sage for an earthy depth. Don't shy away from pre-mixed blends like Italian herbs or Cajun spice for convenience. A pinch of brown sugar can balance spice with a hint of sweetness. Remember, the air fryer intensifies flavors, so avoid over-salting. Fresh herbs like parsley or cilantro added after cooking can elevate the dish. The right mix transforms plain chicken into a mouthwatering masterpiece.
Apply Evenly and Generously
Once you've chosen your seasonings, it's time to coat your chicken thoroughly, guaranteeing every bite is packed with flavor. Start by patting the chicken dry with paper towels—this helps the seasoning stick better. Use your hands or a brush to rub the spices evenly over every surface, including crevices and under the skin if possible. Don't skimp; generous seasoning techniques secure bold flavor distribution. For an extra layer of taste, drizzle a bit of olive oil over the chicken before applying the spices—it'll help them cling and create a golden crust in the air fryer. Let the seasoned chicken rest for 10-15 minutes to allow the flavors to penetrate. This step assures juicy, flavorful results that'll make your air-fried chicken unforgettable.
Preheat the Air Fryer
Before adding the chicken, make sure your air fryer is preheated to 400°F (200°C) to guarantee even cooking and a crispy exterior. Set the preheat temperature and let the air fryer run for about 3-5 minutes, depending on your model. This preheat duration confirms the cooking chamber is hot enough to sear the chicken immediately, locking in moisture and creating that golden, crunchy crust you crave. You'll hear the fan whirring and feel the heat building—signs it's ready. Skipping this step risks uneven cooking, leaving some parts underdone while others dry out. A properly preheated air fryer is your secret weapon for juicy, tender chicken with a satisfying crunch. Trust the process; it's worth the extra few minutes.
Use a Light Oil Coating
Lightly coat your chicken with a thin layer of oil to lock in moisture and keep it tender during cooking. Use a brush or your hands to evenly spread the oil, ensuring every nook and cranny glistens slightly. This step not only prevents the chicken from drying out but also helps it develop a golden, crispy exterior in the air fryer.
Enhance Moisture Retention
To lock in the juiciness of your chicken, a light oil coating is your secret weapon. After patting your chicken dry, drizzle a teaspoon of olive or avocado oil over the surface, then rub it evenly with your hands. This thin layer acts as a barrier, creating moisture locks that prevent the chicken from drying out during cooking. If you've used brine solutions earlier, the oil will amplify their effects, sealing in the flavorful juices. The golden, slightly crisp exterior you'll achieve not only looks appetizing but also traps steam inside, keeping the meat tender. Avoid over-coating—just a light sheen is enough. This simple step guarantees every bite stays succulent, even in the air fryer's intense heat.
Prevent Over-Drying
While the air fryer's intense heat can quickly dry out chicken, a light oil coating is your best defense against over-drying. Brush or spray a thin layer of olive, avocado, or vegetable oil over the chicken before cooking. This creates a barrier that locks in moisture, acting as one of the most effective moisture traps. Pair this with a brine solution for even juicier results—the salt in the brine helps the chicken retain water. Avoid heavy coatings, as they can drip off and cause smoke. Instead, aim for a glossy sheen that glistens under the light. The oil also helps crisp the skin, giving you a golden, crunchy exterior while keeping the inside tender and succulent. A light touch guarantees perfection without greasiness.
Avoid Overcrowding the Basket
When you're cooking juicy chicken in an air fryer, it's tempting to fill the basket to the brim, but overcrowding can sabotage your results. Proper basket spacing is key to ensuring even cooking and that golden, crispy exterior you crave. If you pile pieces too close together, you'll block the hot air circulation, leaving some spots undercooked and others dry. Instead, arrange the chicken in a single layer with at least an inch of space between each piece. This airflow management allows the heat to envelop every nook and cranny, locking in moisture while crisping the skin. If you've got a lot to cook, work in batches—it's worth the extra time for perfectly juicy, evenly cooked chicken every time.
Monitor Cooking Time Closely
Proper spacing in the air fryer basket sets the stage for success, but keeping an eye on the clock is just as important. Air fryers cook food quickly, so time management is vital to avoid overcooking your chicken. Start by setting the timer for the minimum recommended cooking time, usually around 15-20 minutes for boneless cuts. Check the chicken halfway through, flipping it to guarantee even browning and crispiness. Adjust the timer as needed, adding a few minutes if the chicken isn't golden yet. Temperature control also plays a role—higher heat cooks faster but risks drying out the meat. Keep the air fryer at 375°F for juicy results. Watch closely during the final minutes, as the exterior can go from perfect to burnt in seconds.
Check Internal Temperature
To guarantee your chicken is perfectly cooked and safe to eat, you'll want to check its internal temperature with a meat thermometer. Insert the probe into the thickest part of the meat, avoiding bones, as they can skew the reading. For temperature accuracy, make sure your thermometer is properly calibrated—test it in ice water (32°F) or boiling water (212°F) to confirm it's spot-on. Chicken should reach 165°F at its thickest point; this confirms it's juicy and safe. If it's not there yet, return it to the air fryer for a few more minutes and check again. A golden-brown exterior might look tempting, but don't rely on visuals alone—internal heat is key. Properly checking guarantees your chicken is both succulent and safe to enjoy.
Let the Chicken Rest Before Serving
After pulling your chicken from the air fryer, resist the urge to slice into it right away—letting it rest is essential for locking in those juices. Place the chicken on a cutting board or plate, tent it loosely with foil, and let it sit for 5-10 minutes. This resting period allows the juices to redistribute evenly throughout the meat, ensuring every bite is moist and flavorful. Cutting too soon will cause those precious juices to spill out, leaving your chicken dry. The resting benefits also help the chicken reach its ideal serving temperature, making it easier to handle and more enjoyable to eat. You'll notice the difference when you finally slice into it—tender, juicy, and perfectly cooked. Patience pays off!
Disclosure: As an Amazon Associate, I earn from qualifying purchases.


