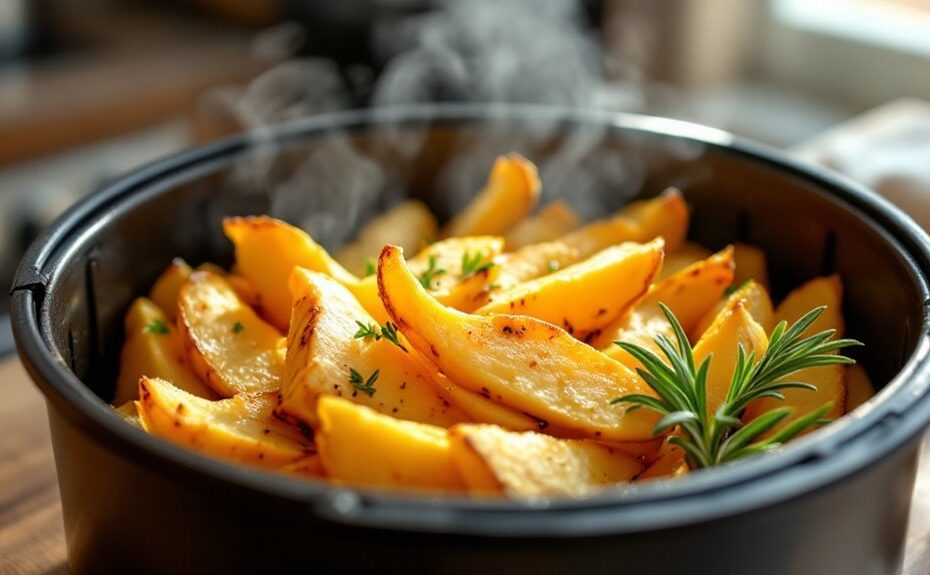
Making crispy parsnips in an air fryer starts with choosing the right roots and cutting them into even pieces to guarantee consistent cooking. You'll toss them with oil and seasonings, but the real secret lies in how you arrange them in the basket and the temperature you set. Preheating is key, and shaking halfway through helps achieve that golden, crunchy exterior. Yet, there's a fine line between perfectly crisp and overdone—timing matters. If you're curious about the exact steps to nail this balance and elevate your parsnips to restaurant-quality, the details ahead will guide you.
Key Takeaways
- Select firm, medium-sized parsnips, peel, and cut into uniform sticks or wedges for even cooking.
- Toss parsnips with olive oil, salt, pepper, and desired seasonings before air frying.
- Preheat air fryer to 400°F and arrange parsnips in a single layer to ensure proper airflow.
- Cook at 375°F for 12-15 minutes, shaking halfway through, until golden-brown and crispy.
- Serve immediately or reheat in the air fryer for 3-5 minutes to restore crispiness.
Choosing the Right Parsnips
When selecting parsnips for air frying, look for firm, smooth roots with a creamy white color and minimal blemishes. Parsnip freshness is key; avoid any that feel soft, have dark spots, or show signs of shriveling. Fresh parsnips should have a slightly sweet, earthy aroma. For root size selection, choose medium-sized parsnips, as they tend to have a balanced flavor and texture. Larger roots can be woody or fibrous, while smaller ones may lack the robust taste you're after. Check the tops if they're attached—they should be vibrant and green, not wilted. Store your parsnips in a cool, dark place or the refrigerator to maintain their quality until you're ready to cook. Proper selection guarantees your air-fried parsnips will be crispy and flavorful.
Preparing the Parsnips for Cooking
After selecting your parsnips, begin by thoroughly washing them under cool running water to remove any dirt or debris. Use a sharp vegetable peeler for the peeling technique, removing the outer skin in smooth, even strokes to preserve the flesh. Trim off the ends, guaranteeing a clean, uniform shape. For consistent cooking, cut the parsnips into sticks or wedges, maintaining a cutting thickness of about ¼ to ½ inch. Thicker cuts yield a tender interior, while thinner pieces crisp up faster. Aim for even sizes to prevent uneven browning. Pat the pieces dry with a clean kitchen towel to remove excess moisture, which helps achieve maximum crispiness. Proper preparation secures your parsnips cook evenly and develop that perfect golden crunch in the air fryer.
Seasoning for Maximum Flavor
With your parsnips prepped and dried, it's time to enhance their natural sweetness and earthy flavor with the right seasoning. Start by tossing them in a light coating of olive oil to help the seasoning adhere. For a classic touch, sprinkle salt and freshly cracked black pepper, then add a pinch of smoked paprika for depth. Experiment with herb blends like rosemary, thyme, and oregano for a fragrant, savory profile. If you prefer bold flavors, try spice mixes such as cumin, coriander, and chili powder for a warm, slightly smoky kick. Don't forget a hint of garlic powder or onion powder to round out the taste. Mix the seasonings well to guarantee even distribution, making certain every bite is packed with flavor.
Preheating the Air Fryer
To guarantee your parsnips cook evenly and achieve that perfect crispiness, preheating your air fryer is essential. Set the air fryer to 400°F and let it run for 3-5 minutes before adding your seasoned parsnips. This step secures temperature accuracy, allowing the hot air to circulate immediately and create a consistent cooking environment. Preheating benefits include faster cooking times and a more even texture, as the parsnips won't sit in a cooler appliance while it heats up. Skipping this step can lead to uneven browning or soggy results. Always check your air fryer's manual for specific preheating instructions, as models vary. Once preheated, you'll notice the appliance reaches the ideal temperature quickly, setting the stage for perfectly crispy parsnips.
Arranging Parsnips in the Air Fryer Basket
Though preheating guarantees the air fryer is ready, arranging the parsnips properly in the basket is just as crucial for achieving even crispiness. Start by confirming proper basket spacing—avoid overcrowding to allow hot air to circulate freely. Place the parsnips in a single layer, leaving small gaps between each piece. If you're cooking a larger batch, use a layer arrangement by stacking a second layer, but stagger the pieces to prevent blocking airflow. Lightly spray or toss the parsnips with oil to enhance browning and prevent sticking. Shake the basket halfway through cooking to confirm even exposure to heat. Proper arrangement guarantees each piece crisps uniformly, avoiding soggy or undercooked spots. This step is key to achieving that golden, crunchy exterior.
Setting the Correct Time and Temperature
Set your air fryer to 375°F for ideal crispiness, ensuring the parsnips cook evenly without burning. Cook them for 12-15 minutes, shaking the basket halfway through to promote uniform browning. Keep a close eye during the final minutes to achieve a golden, crunchy exterior while maintaining a tender interior.
Optimal Temperature Settings
For perfectly crispy parsnips in an air fryer, you'll want to preheat the appliance to 400°F (200°C). This high temperature guarantees rapid browning and a satisfying crunch while maintaining the parsnips' tender interior. Temperature accuracy is vital, so use an oven thermometer to verify your air fryer's settings if needed. The intense heat promotes even heat distribution, preventing soggy spots and guaranteeing uniform crispiness. Avoid overcrowding the basket, as this can disrupt airflow and lead to uneven cooking. If your air fryer has adjustable temperature settings, stick to 400°F for consistent results. Preheating also helps the parsnips start cooking immediately, locking in moisture while creating a golden, crispy exterior. This balance of heat and timing is key to achieving restaurant-quality parsnips at home.
Ideal Cooking Duration
Once your air fryer is preheated to 400°F, the cooking time for parsnips typically ranges between 15 to 20 minutes. Adjust the duration based on parsnip size—smaller pieces may crisp up in 15 minutes, while larger chunks could take closer to 20. Freshness also plays a role; fresher parsnips tend to cook faster and achieve a more consistent texture. For even cooking, cut them into uniform pieces, about 1-inch thick, and avoid overcrowding the basket. Shake the basket halfway through to guarantee all sides crisp evenly. If you're unsure, start with 15 minutes and check for doneness. The goal is golden-brown edges with a tender interior. Remember, precise timing guarantees your parsnips are crispy, not burnt or undercooked.
Monitoring for Crispiness
To achieve perfectly crispy parsnips, you'll need to monitor the air fryer closely, as timing and temperature are critical. Start by setting the air fryer to 400°F and cooking for 10 minutes. After this initial cook, shake the basket to guarantee even browning. Check for crispiness indicators like a golden-brown exterior and a firm, slightly caramelized edge. Perform a texture evaluation by pressing a parsnip piece—it should feel crunchy on the outside but tender inside. If they're not yet crisp, continue cooking in 2-minute increments, checking after each interval. Overcooking can lead to bitterness, so stay attentive. Once they reach the desired crispiness, remove them immediately to prevent burning. Proper monitoring secures a perfect balance of crunch and flavor.
Shaking or Flipping for Even Crispiness
While the parsnips cook, shake the basket or flip them halfway through to guarantee even crispiness. For the best results, use a shaking frequency of once every 5-7 minutes, depending on your air fryer's power. Gently shake the basket to redistribute the parsnips, making sure all sides are exposed to the hot air. If flipping, use tongs or a spatula to carefully turn each piece, maintaining their golden-brown edges. This flipping technique prevents uneven cooking and guarantees a consistent crunch. Avoid overcrowding the basket, as it can hinder airflow and reduce crispiness. By shaking or flipping, you'll achieve a uniform texture, with each bite offering the perfect balance of tender interior and crispy exterior. This step is essential for mastering the art of air-fried parsnips.
Checking for Desired Crispiness
Check the parsnips for a golden-brown color and a slightly blistered surface to confirm visual crispiness. Gently press a piece with tongs or your finger—it should feel firm and crunchy, not soft or yielding. If they're not quite there, return them to the air fryer in 1-2 minute increments to avoid overcooking.
Visual Texture Check
Once the parsnips have cooked for the recommended time, open the air fryer basket and inspect their surface. Look for a golden-brown color with slight charring on the edges, which indicates proper caramelization. During your visual inspection, compare the texture to the ideal crispiness—shiny, slightly wrinkled skin with a matte finish in spots. If the parsnips appear pale or overly smooth, they likely need more time. Conversely, if they're dark brown or blackened, they may be overcooked. Pay attention to uniformity; uneven browning suggests the pieces weren't evenly spaced or flipped. A successful texture comparison will reveal a balance between a crisp exterior and a tender interior. Adjust cooking time in 1-2 minute increments if needed, ensuring you achieve the desired visual cues before proceeding.
Touch Test Method
After visually confirming the parsnips' golden-brown exterior, use the touch test to assess their crispiness. Gently press a parsnip with your fingertip, applying light finger pressure to gauge its texture. A perfectly crispy parsnip should feel firm and slightly resistant, with a satisfying crunch under minimal pressure. If it feels soft or yields too easily, it needs more time in the air fryer. For a thorough texture assessment, test multiple pieces to guarantee consistency. Avoid pressing too hard, as this can crush the parsnips and compromise their structure. Once they meet the desired crispness, remove them immediately to prevent overcooking. This tactile method guarantees your parsnips achieve the ideal balance of a golden exterior and a satisfyingly crisp bite.
Serving and Storing Crispy Parsnips
When your parsnips are golden and crisp, serve them immediately to enjoy their peak texture and flavor. Pair them with a creamy dip like garlic aioli or a tangy yogurt sauce for added depth. For serving suggestions, sprinkle them with flaky sea salt, fresh herbs like parsley or thyme, or a dash of smoked paprika to elevate their natural sweetness. If you're storing leftovers, let them cool completely before placing them in an airtight container. Use storage tips like reheating in the air fryer at 375°F for 3-5 minutes to restore their crunch. Avoid refrigeration if possible, as it can soften the texture. For longer storage, freeze them in a single layer on a baking sheet, then transfer to a freezer-safe bag. Reheat directly from frozen for best results.
Disclosure: As an Amazon Associate, I earn from qualifying purchases.


