Making air fryer venison curry starts with marinating tender cubes of venison in a spiced yogurt blend, but the real magic happens when you combine the air-fried meat with a rich, aromatic curry sauce. You'll need to balance the bold flavors of cumin, coriander, and coconut milk, but the secret lies in how you layer the spices and textures. The air fryer guarantees the venison stays juicy while developing a slight crisp, but what comes next will elevate the dish to something unforgettable. Curious about the steps that tie it all together? Let's break it down.
Key Takeaways
- Marinate venison in yogurt, garlic, ginger, and spices for at least 2 hours to tenderize and infuse flavor.
- Preheat the air fryer to 375°F and cook venison in a single layer for 8-10 minutes, flipping halfway.
- Combine cooked venison with curry sauce, coconut milk, and spices, then simmer gently to blend flavors and tenderize the meat.
- Serve the curry with basmati rice or naan, garnished with fresh cilantro, lime juice, or sliced chilies for added brightness.
- Use high-quality curry paste and balance bold spices with creamy coconut milk for a rich, aromatic dish.
Gather Your Ingredients
Before you start cooking, make sure you've got all your ingredients ready. Begin with ingredient selection: choose fresh, high-quality venison for its rich, gamey flavor. You'll also need curry powder, coconut milk, garlic, ginger, and onions to build depth. For heat, pick red chili flakes or fresh green chilies. Don't forget turmeric, cumin, and coriander for earthy warmth. Fresh cilantro and lime juice will add brightness at the end. For ingredient preparation, dice the onions finely, mince the garlic and ginger, and slice the chilies. Measure out your spices and have them ready to go. If using canned coconut milk, give it a good shake before opening. Proper prep guarantees a smooth cooking process and lets you focus on layering flavors as you build your curry.
Prepare the Venison
Start by trimming any excess fat or silver skin from the venison, as these can toughen during cooking. Use a sharp knife to carefully remove these parts, guaranteeing the meat remains tender. Cut the venison into bite-sized cubes, roughly 1-inch pieces, to allow even cooking and better absorption of the venison seasoning. Pat the meat dry with paper towels to remove excess moisture, which helps achieve a better sear and enhances flavor. For meat preparation, lightly season the cubes with salt and pepper to enhance the natural richness of the venison. Avoid over-seasoning at this stage, as the curry will add robust flavors later. Properly prepped venison secures a tender, flavorful base for your curry, setting the stage for a delicious dish.
Marinate the Venison
To infuse the venison with deep, aromatic flavors, combine yogurt, minced garlic, grated ginger, ground cumin, coriander, turmeric, and a pinch of cayenne pepper in a mixing bowl. Whisk the spice blend until smooth, ensuring the yogurt evenly coats the spices. Add the venison pieces to the bowl, tossing them thoroughly to coat each piece in the marinade. The yogurt tenderizes the meat while the spices penetrate, creating a rich, layered flavor profile. Cover the bowl with plastic wrap and refrigerate for at least 2 hours, though overnight marinate time yields the best results. This allows the venison to absorb the bold, earthy notes of cumin and coriander, the warmth of ginger, and the subtle heat from cayenne. Avoid over-marinating, as the yogurt can break down the meat too much.
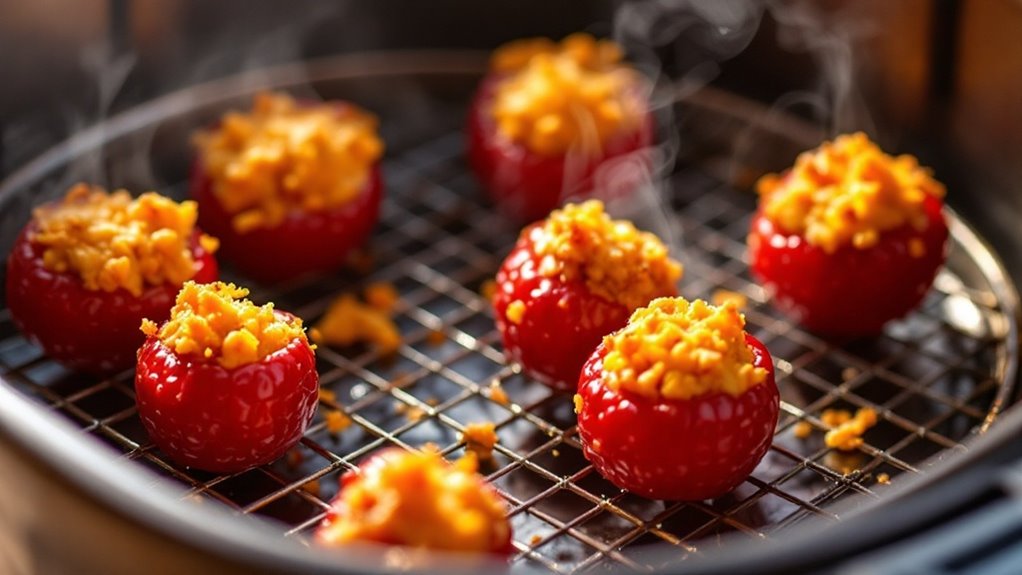
Preheat the Air Fryer
While the venison marinates, set your air fryer to 375°F and let it preheat for about 5 minutes. This preheat temperature guarantees the air fryer is hot enough to sear the venison, locking in its rich, gamey flavor while creating a tender interior. Check your air fryer settings to confirm it's set to the correct temperature, as this step is vital for even cooking. Preheating also helps prevent the meat from sticking to the basket, securing a crisp exterior. If your air fryer has a preheat function, use it; otherwise, simply set the temperature manually. Avoid overcrowding the basket later by making certain the air fryer is fully heated before adding the venison. This step sets the stage for perfectly cooked, flavorful curry.
Cook the Venison in the Air Fryer
Once the air fryer is preheated, carefully place the marinated venison in a single layer in the basket, making sure the pieces aren't touching. Set the air fryer to 375°F and cook for 8-10 minutes, flipping the venison halfway through. This temperature guarantees the meat cooks evenly while retaining its tender venison texture. Avoid overcrowding the basket, as it can lead to steaming instead of crisping. The high heat will caramelize the marinade, enhancing the venison's rich, gamey flavor. Check for doneness by slicing into a piece—it should be slightly pink in the center for medium-rare. Overcooking can toughen the meat, so monitor closely. Once done, remove the venison and let it rest for 5 minutes to lock in juices. This step secures the perfect foundation for your curry.
Prepare the Curry Sauce
As the venison rests, heat a tablespoon of oil in a large skillet over medium heat. Add finely chopped onions and sauté until golden, about 5 minutes. Stir in minced garlic and ginger, cooking until fragrant. Sprinkle in your curry spices—turmeric, cumin, coriander, and a pinch of cayenne—toasting them briefly to release their aroma. Pour in a can of coconut milk, stirring to combine, and let it simmer gently. Add tomato paste for depth and a splash of fish sauce for umami. Adjust the sauce consistency by adding a bit of broth or water if it thickens too much. Taste and season with salt, balancing the flavors. The sauce should be rich, aromatic, and slightly creamy, ready to envelop the venison.
Combine Venison and Curry Sauce
Cut the venison into bite-sized pieces, ensuring they're evenly sized for consistent cooking. Mix your curry sauce ingredients—like coconut milk, curry paste, and spices—until smooth and aromatic. Toss the venison pieces in the sauce, coating them thoroughly to infuse the rich, spiced flavors into the meat.
Prepare Venison Pieces
To prepare the venison pieces, start by trimming any excess fat or silver skin from the meat, guaranteeing tender, bite-sized chunks. Cut the venison into uniform 1-inch cubes to promote even cooking and better absorption of the venison seasoning. Pat the pieces dry with a paper towel to remove moisture, which helps achieve a better sear and locks in flavor. Lightly season the meat with salt and pepper, or a dry rub of your choice, to enhance its natural richness. Venison's lean texture benefits from careful meat preparation, so avoid overhandling to prevent toughness. Let the seasoned pieces rest for 10 minutes, allowing the flavors to penetrate. This step secures the venison pairs perfectly with the curry sauce, creating a harmonious blend of savory and aromatic notes.
Mix Curry Sauce Ingredients
While the venison rests, gather your curry sauce ingredients to create a rich, aromatic base. Start by preparing the curry paste: combine 2 tablespoons of red curry paste, 1 teaspoon of turmeric, 1 teaspoon of cumin, and ½ teaspoon of coriander in a bowl. Adjust the spice blend ratios to suit your taste, adding a pinch of cayenne for heat if desired. Whisk in 1 cup of coconut milk until smooth, ensuring the spices are evenly distributed. Stir in 1 tablespoon of fish sauce and 1 teaspoon of brown sugar to balance the flavors. For depth, add a splash of lime juice and a handful of finely chopped lemongrass. This curry paste preparation will infuse the sauce with bold, layered flavors, perfectly complementing the venison's richness.
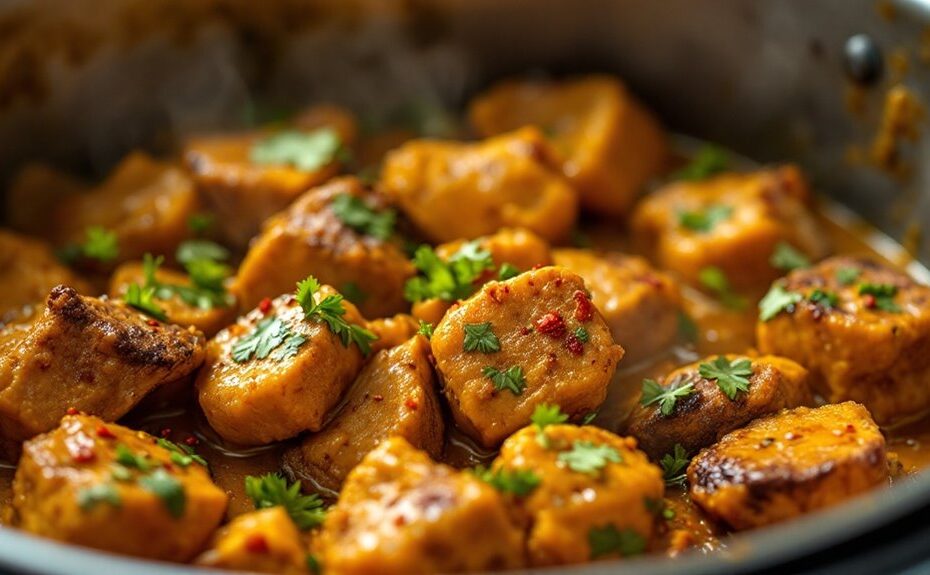
Combine Venison and Sauce
Once the curry sauce is prepared, transfer the rested venison to a large mixing bowl and pour the sauce over it, guaranteeing each piece is thoroughly coated. The venison texture, tender yet firm, absorbs the rich, aromatic sauce, enhancing its natural gamey flavor. Use a spatula or your hands to gently toss the meat, making sure the sauce consistency—thick and velvety—clings evenly to every piece. This step secures the venison is fully infused with the spices and coconut milk, creating a harmonious blend of flavors. Let the mixture sit for 10 minutes to allow the meat to marinate slightly, deepening the taste. The sauce should coat the venison without being overly runny, confirming a balanced bite when cooked. This preparation sets the stage for a perfectly seasoned curry.
Simmer to Blend Flavors
Combine the venison and curry sauce thoroughly in the air fryer basket, ensuring the meat is evenly coated. Adjust the heat to a low simmer, allowing the spices to meld and the venison to absorb the rich, aromatic flavors. Stir occasionally to maintain a smooth, consistent texture and prevent sticking.
Combine Ingredients Thoroughly
After adding all the ingredients to the pot, stir them together until the curry paste evenly coats the venison and vegetables. Use a wooden spoon to gently fold the mixture, making sure the spices and aromatics are well-distributed. This step is vital for ingredient mixing tips, as it helps the flavors meld seamlessly. Pay attention to the texture—the curry paste should cling to the meat and veggies without clumping. Incorporate flavor blending techniques by letting the coconut milk or broth integrate fully, creating a rich, cohesive base. The venison should absorb the curry's warmth, while the vegetables soften slightly, releasing their natural sweetness. Stirring thoroughly guarantees every bite is infused with the bold, aromatic essence of the spices. This foundational step sets the stage for a deeply flavorful curry.
Adjust Heat for Simmering
To guarantee the flavors meld perfectly, reduce the heat to a gentle simmer once the curry reaches a boil. This step is essential for heat control tips, as it allows the spices, venison, and vegetables to infuse harmoniously without overcooking. Lower the temperature to medium-low or low, depending on your stove, ensuring the curry bubbles lightly but doesn't scorch. Temperature adjustments like this prevent the sauce from reducing too quickly, which could leave it overly thick or unevenly seasoned. A steady simmer coaxes out the earthy notes of cumin, the warmth of turmeric, and the richness of coconut milk, creating a balanced depth of flavor. Keep an eye on the heat, adjusting slightly if needed, to maintain the ideal simmering pace for tender venison and a velvety sauce.
Stir Occasionally for Consistency
While the curry simmers, stir it occasionally to guarantee even cooking and prevent sticking. Use gentle stirring techniques, like folding the mixture with a wooden spoon, to maintain the tender texture of the venison and avoid breaking down the vegetables. This secures the spices, coconut milk, and broth meld evenly, creating a rich, cohesive flavor. Pay attention to consistency tips, such as scraping the bottom of the pot to prevent burnt bits and securing the sauce thickens uniformly. Stirring also helps distribute the heat, allowing the curry to develop a deep, aromatic profile. If the sauce thickens too much, add a splash of broth or water. Consistent stirring secures every bite is infused with the curry's bold, savory essence.
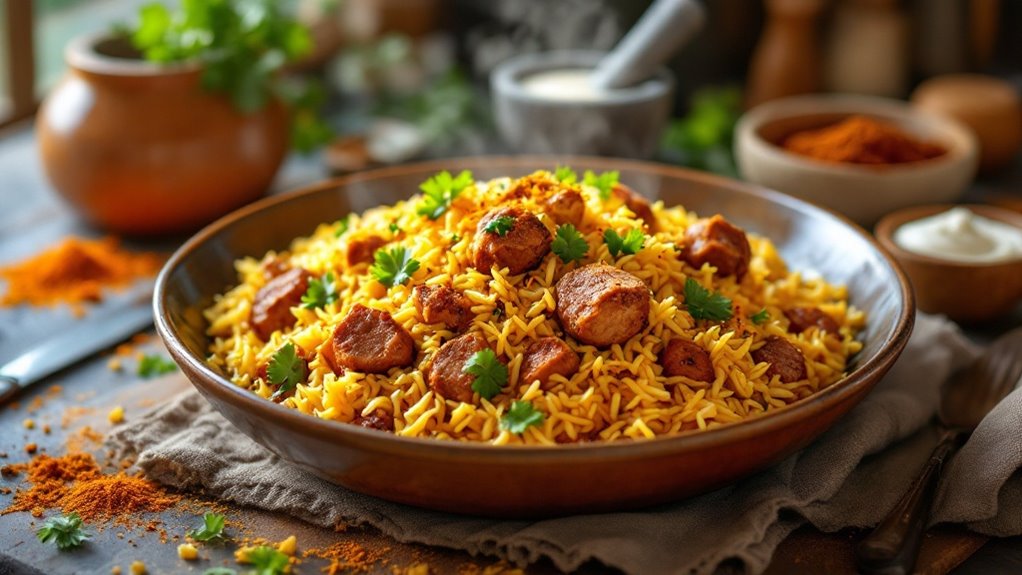
Serve and Enjoy
Once the venison curry is golden and aromatic, transfer it to a serving dish while it's still piping hot. Pair it with fluffy basmati rice or warm naan to soak up the rich, spiced gravy. For side dishes, consider a cooling cucumber raita or a tangy mango chutney to balance the curry's bold flavors. Garnish the dish with fresh cilantro leaves, a squeeze of lime juice, or thinly sliced red chilies for a vibrant finish. The cilantro adds a fresh, herbal note, while the lime enhances the curry's tanginess. Serve immediately to enjoy the tender venison and the deep, layered spices at their peak. This hearty, flavorful dish is perfect for sharing, so gather your loved ones and savor every bite.
Disclosure: As an Amazon Associate, I earn from qualifying purchases.